Connect Postgres
Connect your Postgres source to Bigeye.
Depending on where your PostgreSQL server is hosted, you may need to take some additional steps in addition to the ones listed below. For example, on Amazon RDS, you may need to enable the appropriate security groups.
1. Create a PostgreSQL read-only user
Bigeye recommends creating a read-only user for connecting to your database. You can do this by following these steps using psql:
- Connect to your PostgreSQL server instance using the following command:
sudo -u postgres psql- Select the database to connect to Bigeye:
\c databasename;- Create a new role for your Bigeye read-only user:
CREATE ROLE bigeye_read_only_user LOGIN PASSWORD '<yourpassword>';- Grant the necessary privileges for the new user to connect to your
database:
GRANT CONNECT ON DATABASE exampledb TO bigeye_read_only_user;
GRANT USAGE ON SCHEMA public TO bigeye_read_only_user;- Run the following command to generate the queries that grant select
access to your new user:
SELECT 'GRANT SELECT ON '||schemaname||'."'||tablename||'" TO bigeye_read_only_user;' FROM pg_tables WHERE schemaname IN ('public') ORDER BY schemaname, tablename;- Copy the GRANT statements generated by the query and then paste them into your terminal window. To restrict access to a subset of tables, only run the GRANT statements for the corresponding tables. You can also limit access to specific columns using schema.
Your new read-only user now has the necessary permissions for Bigeye to connect to your database.
Default PrivilegesTo ensure that the Bigeye service account has access to schemas and databases that are created in the future, you will want to use ALTER DEFAULT PRIVILEGES to modify the default permissions.
Example SQL script to create the user and grant the appropriate permissions:
-- Create the role
CREATE ROLE bigeye_read_only_user LOGIN PASSWORD '<yourpassword>';

-- Grant the role the ability to connect to the database
GRANT CONNECT ON DATABASE "your-database" TO bigeye_read_only_user;

-- Grant the role the ability to "use" the schema
GRANT USAGE ON SCHEMA "your-schema-1" TO bigeye_read_only_user;
GRANT USAGE ON SCHEMA "your-schema-2" TO bigeye_read_only_user;

-- Change the defaults for new (future) tables in schemas
ALTER DEFAULT PRIVILEGES IN SCHEMA "your-schema-1" GRANT SELECT ON TABLES TO bigeye_read_only_user;
ALTER DEFAULT PRIVILEGES IN SCHEMA "your-schema-2" GRANT SELECT ON TABLES TO bigeye_read_only_user;

-- Change the defaults for new (future) schemas in database
ALTER DEFAULT PRIVILEGES GRANT USAGE ON SCHEMAS TO bigeye_read_only_user;

-- Grant select on EACH existing table (using step 6 above to generate this)

GRANT SELECT ON TABLE "your-schema-1"."your-table-1" TO bigeye_read_only_user;
GRANT SELECT ON TABLE "your-schema-1"."your-table-2" TO bigeye_read_only_user;
GRANT SELECT ON TABLE "your-schema-2"."your-table-1" TO bigeye_read_only_user;
GRANT SELECT ON TABLE "your-schema-2"."your-table-2" TO bigeye_read_only_user;
2. Allow Bigeye's IP address
By default, PostgreSQL restricts connections to hosts and networks included in the pg_hba.conf file. Add all of Bigeye's Static IP addresses to this file in the following format to allow connectivity to your database:
host databaseName username 11.22.33.44 md5
Here’s an example where the username is bigeye_read_only and the database is mydatabase:
host mydatabase bigeye_read_only 11.22.33.44 md5
An entry for the user at each address in Bigeye's Static IP addresses should be added.
Restart your PostgreSQL server for the changes to take effect.
For more details on modifying the pg_hba.conf file, consult the PostgreSQL documentation.
3. Add PostgreSQL as a data source in Bigeye
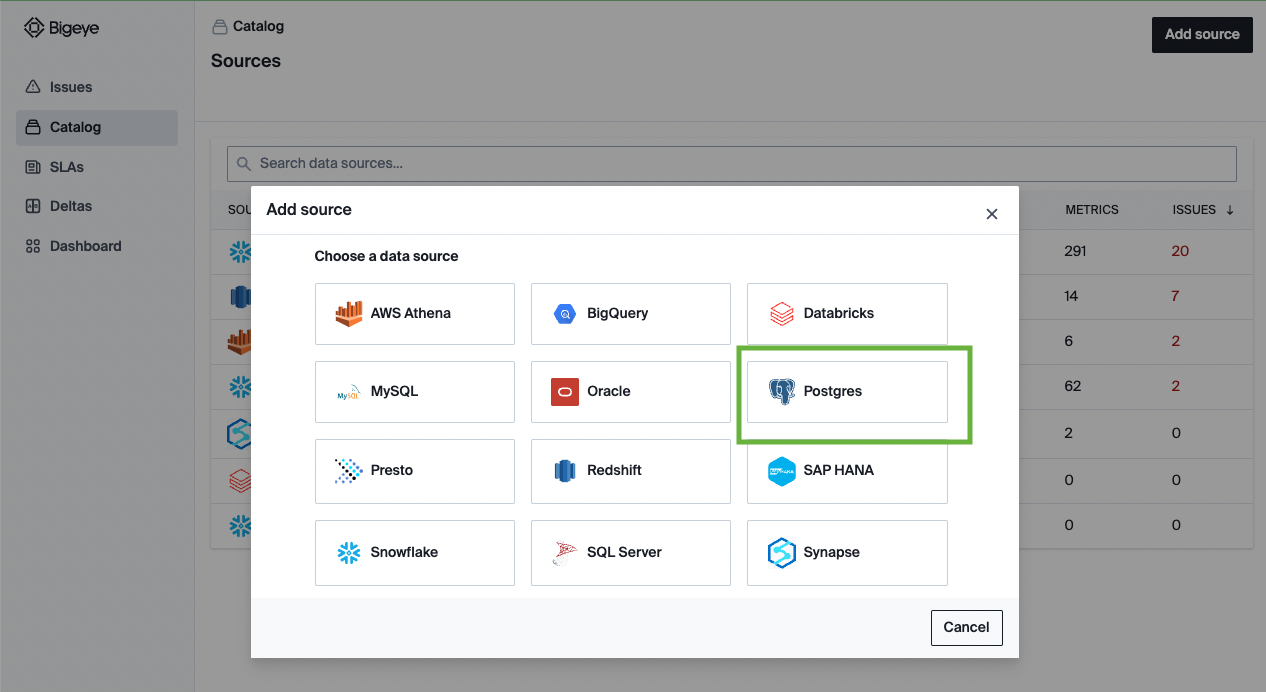
On the Catalog page, click Add source, and then select Postgres from the Choose a data source section. Click Next to configure the connection to your database.

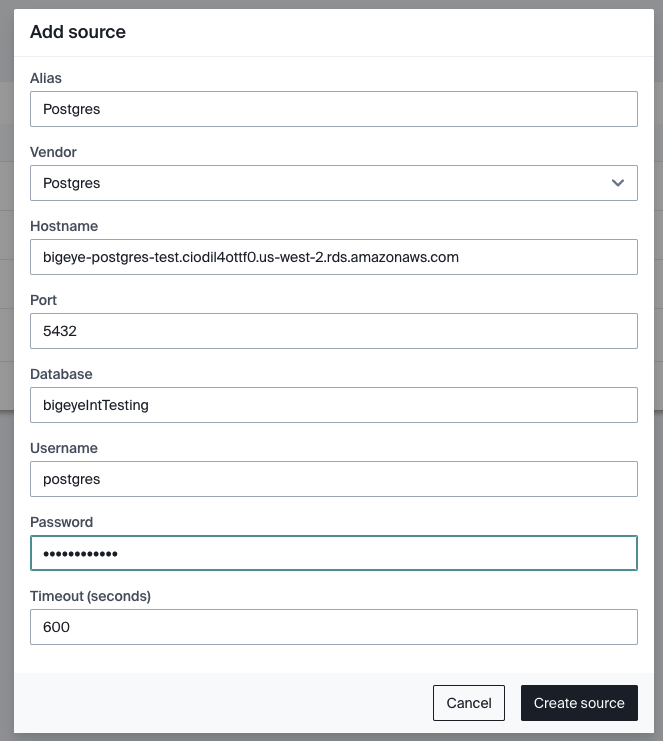
On the Configure source modal that opens, enter the following details:
| Field Name | Description |
|---|---|
| Alias | The identifying name of the data source. |
| Vendor | Postgres |
| Hostname | The name of the server that hosts your database. |
| Port | The default port is 5432. |
| Database | The name of the database. |
| Username | The name of the dedicated user for Bigeye. |
| Password | The password of the Bigeye user. |
| Timeout | The period of non-activity in seconds, after which the database closes its connection. |

4. Next Steps
After you've configured the source, Bigeye loads and profiles your tables. It can take up to 24 hours for the profiling to complete and your autometrics and autothresholds to populate. See how to deploy autometrics in the Getting Started guide.
Updated 3 months ago
