Connect AWS Redshift
Connect your AWS Redshift source to Bigeye.
1. Allow Bigeye's IP Address
For Bigeye to connect to your Redshift database, edit inbound rules to add Bigeye's Static IP addresses in your Cluster’s Security Group settings:
- Log in to the Redshift Management Console.
- Select Clusters from the left sidebar, and select the cluster you want to connect to Bigeye.
- From the Cluster Details page, navigate to the Properties tab and scroll to the Network and Security section.
- Under VPC Security Groups, click the Security Group you want to use to allow communication from Bigeye.
- Click the Inbound Rules tab at the bottom of the page and click Edit.
- Click Add Rule to add a new Inbound Rule.
a. Set the Type to Redshift.
b. Adjust the Port, if required.
c. Enter one of Bigeye's Static IP addresses into the Source field - Repeat step 6 for each of Bigeye's Static IP addresses .
- Click Save rules.

2. Make the Redshift cluster publicly accessible
- From the AWS Management Console, navigate to the Amazon Redshift console.
- On the navigation menu, choose CLUSTERS.
- Select the cluster that you want to modify.
- Choose Actions.
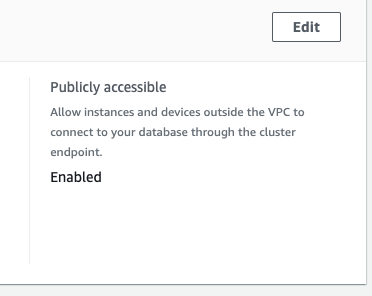
- Edit the Publicly accessible setting.
- Choose Enable.
- Choose Save changes.

3. Create a user for Bigeye
Create a dedicated user for Bigeye and grant SELECT permissions to the tables that the user must access.
To create a new user, go back to the Redshift console, connect the query editor to your data source, and run the query below, replacing <bigeye_user> and <password> with your new username and password combination:
The password must contain at least one uppercase, one lowercase, and one numeric character.
CREATE USER <bigeye_user> WITH PASSWORD '<password>' SYSLOG ACCESS UNRESTRICTED;
GRANT SELECT ON svv_table_info to <username>`;
To grant select permissions on all tables in a schema, run the query below, replacing <schema_name> with the name of your schema and <bigeye_user> with the user you created above.
GRANT USAGE ON SCHEMA <schema_name> TO <bigeye_user>;
GRANT SELECT ON ALL TABLES IN SCHEMA <schema_name> TO <bigeye_user>;
ALTER DEFAULT PRIVILEGES IN SCHEMA <schema_name> GRANT SELECT ON TABLES TO <bigeye_user>;
To grant SELECT permissions on a table-by-table basis, you can run the query below to generate the queries to GRANT SELECT ON each table in a schema. Exclude any grant statements for tables that the user must not access.
The AWS Redshift query editor does not run multi-statement queries. Use SQL Workbench to connect to Redshift and run multiple queries at one time
SELECT 'GRANT SELECT ON '||schemaname||'."'||tablename||'" TO <username>;' FROM pg_tables WHERE schemaname IN ('<schema>') ORDER BY schemaname, tablename;Copy the output of this command and paste it into SQL workbench, but make sure to remove any lines for tables that you do not want the user to access.
4. Gather Redshift connection details
Gather the following connection details from Redshift:
-
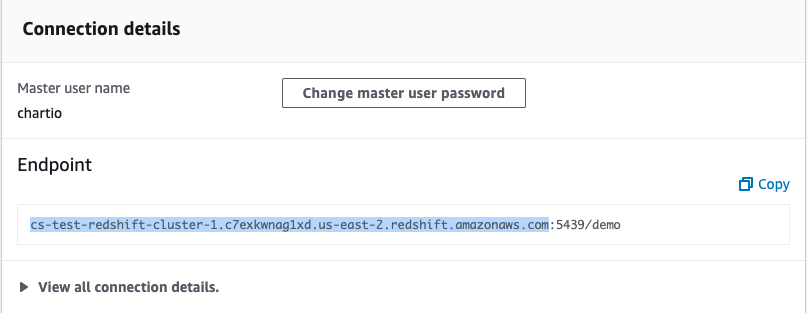
Endpoint: The endpoint of your Redshift cluster database
Go to the Properties tab of your Redshift Cluster Details page.
Under the Connection details section, copy the Endpoint up to but not including the colon (:).

-
Database Port: The default port number for Redshift is 5439.
From your Redshift Cluster Details page, you can find the port number under the Database Configurations section of the Properties tab.
-
Username: The name of the dedicated read-only user for Bigeye.
-
User Password: The password of the user.
-
Database Name: The name of your Redshift database
You can also find your Database Name under the Database Configurations section of the Properties tab.
5. Add Redshift as a data source in Bigeye
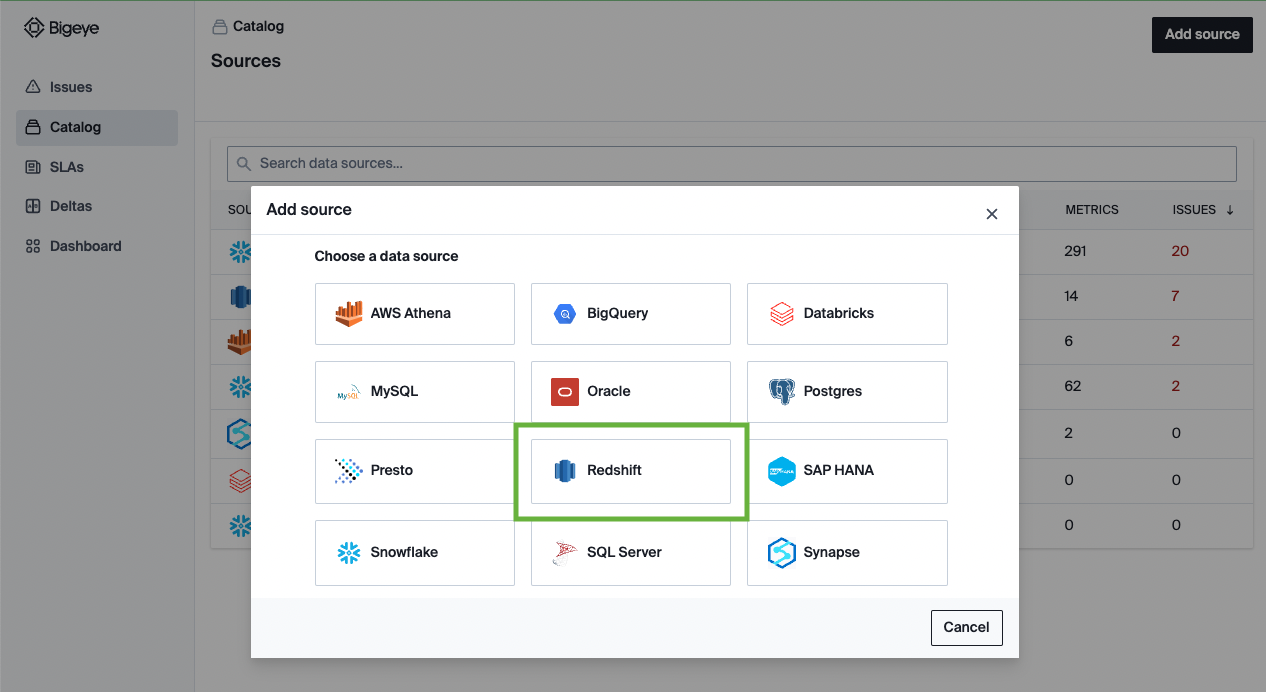
On the Catalog page, click Add source and then select Redshift from the Choose a data source section. Click Next to configure the connection to your database.

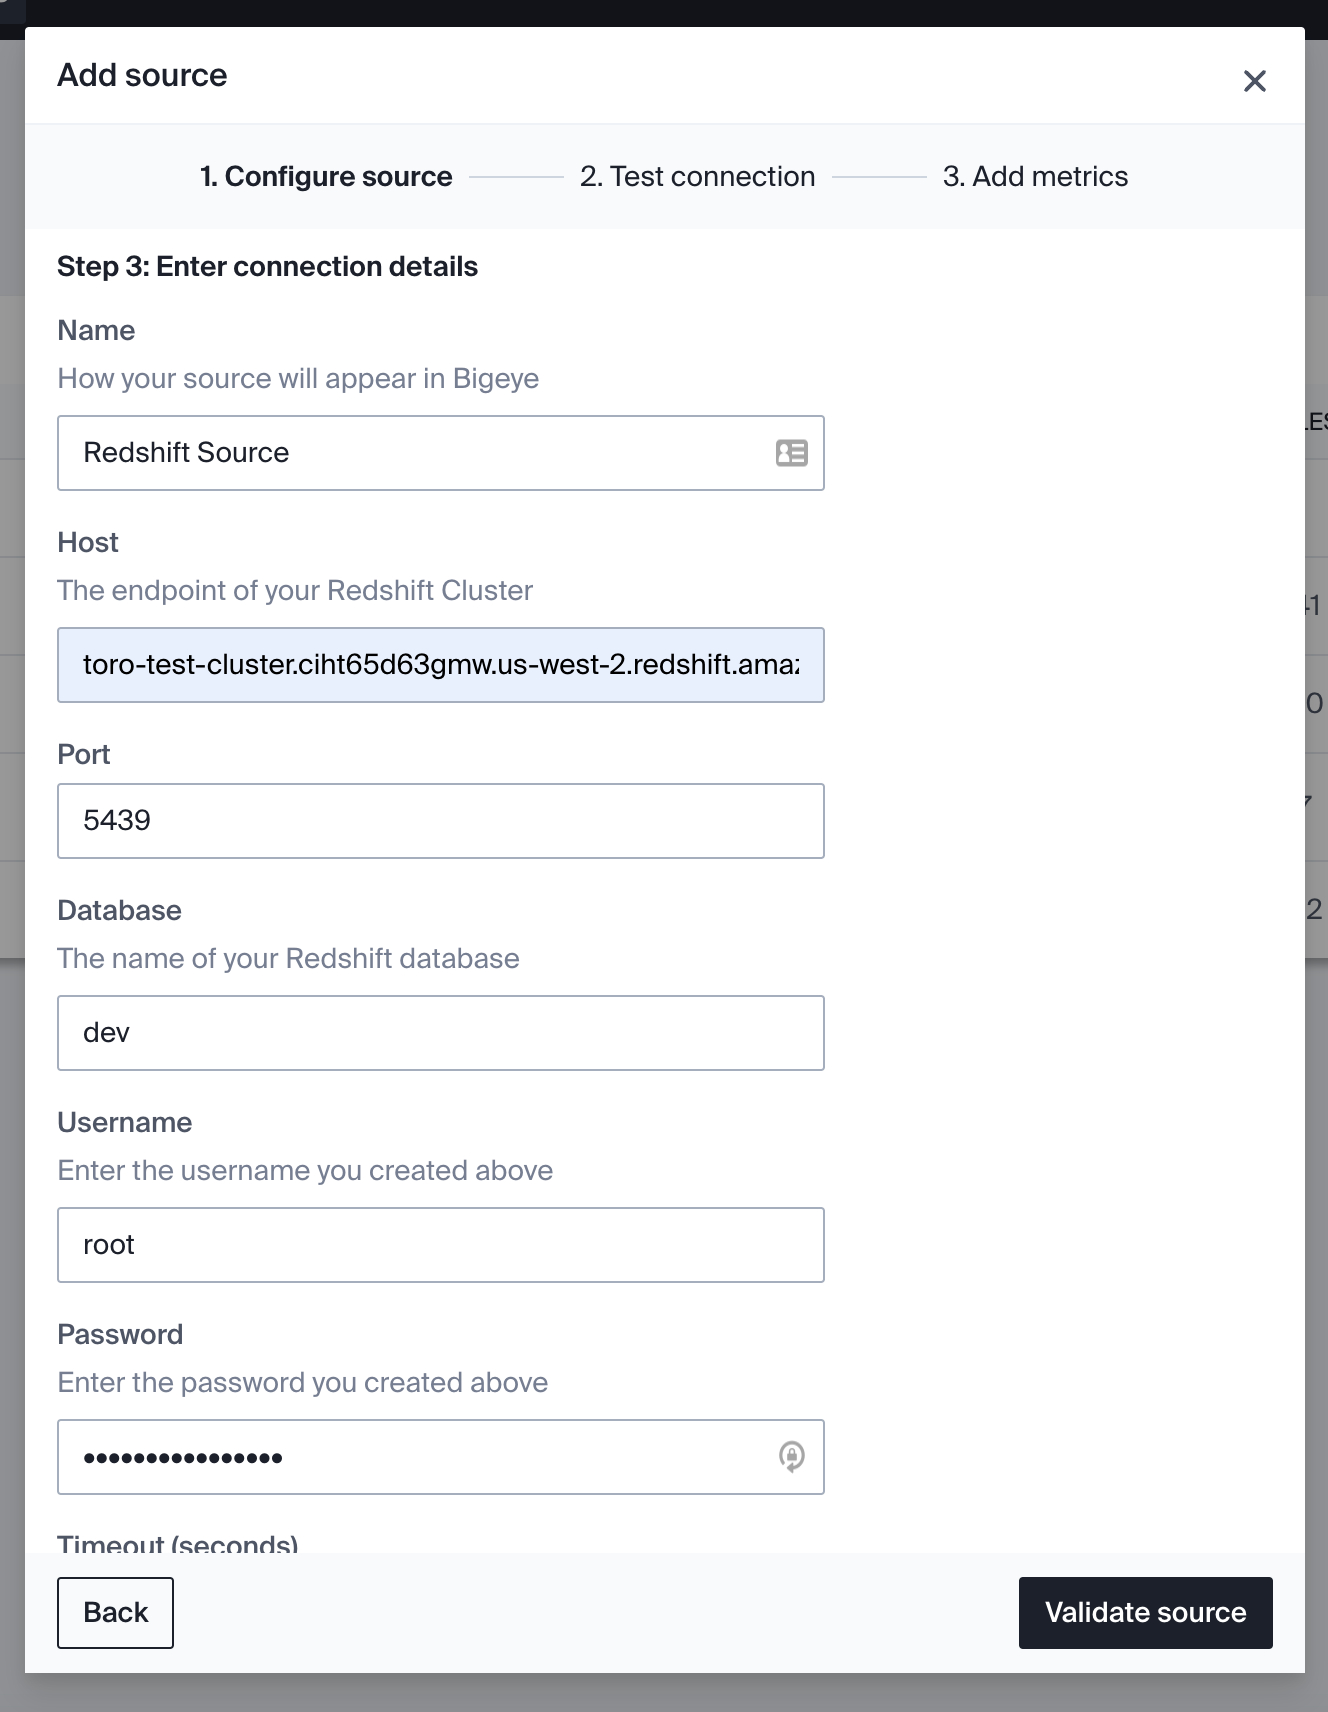
On the Configure source modal that opens, enter the following details:
| Field Name | Description |
|---|---|
| Alias | The string that displays your source name in the Bigeye Catalog. |
| Vendor | Redshift |
| Host | The endpoint from Step 3. |
| Port | The Redshift host port. |
| Database name | The database name. |
| Username | The name of the dedicated user for Bigeye. |
| Password | The password of the Bigeye user. |

6. Test connection
The system queries your warehouse to ensure the user you provided has the required permissions to read data and run all Bigeye metric types. If the test connection returns an error, return to Step 2: Create a user for Bigeye and verify that the user has all the required permissions in Redshift.
7. Add metrics
After the test connection is successful, you can deploy Metadata Metrics on your schemas. Bigeye recommends broad coverage of these metrics across your warehouse to detect the most common data quality issues.
Once you’ve added your source, Bigeye profiles your data to recommend autometrics. It can take up to 24 hours for this process to complete. Proceed to the Getting Started guide for the next steps.
Updated 3 months ago
