
Microsoft Entra
Summary
This short series of steps enables Entra admins to connect their Entra instances to Bigeye for single sign on. Bigeye supports SSO via OpenID Connect (OIDC). Upon completion, your employees will be able to login to Bigeye via Microsoft Entra.
Note - substitute the email domain valuesMake sure to enter the same
<domain>value throughout this process. The domain will be the email domain of your users such asexample.com. If you have more than one domain, it is recommended to set up more than one connection inside of Bigeye.
Note - your Bigeye URL may be differentIf you use a Bigeye URL that is different from app.bigeye.com, please substitute your Bigeye URL while performing the steps of this configuration.
Part 1: Configure Entra application for Bigeye
To register your app with Entra, see Microsoft's Quickstart: Register an application with the Microsoft identity platform
During this registration, configure the following settings:
- Redirect URI:
https://app.bigeye.com/sso/oidcLogin/<domain>
To create the client secret, follow the steps in Microsoft's Quickstart: Add credentials
If you would like to use a logo, use the one at this URL: https://app.bigeye.com/images/bigeye-logo.png
Part 2: Gather required information for Bigeye
To configure your SSO into Bigeye, the following information will need to be gathered:
- Microsoft Entra Domain (e.g. mycompany.onmicrosoft.com)
- This can be gathered from the Overview screen. If not present there, it is the Publisher domain on the Branding and Properties page
- This value is used as the "Issuer URL" when configuring Bigeye.
- Alternatively, you can build your Issuer URL by finding your tenant ID, and prepending
https://login.microsoftonline.comto it e.g.https://login.microsoftonline.com/abcd-1234
- Client ID
- This can be gathered from the application's Overview screen. It is the Application (client) ID
- Client Secret (from the step above)
Part 3: Configure Bigeye to integrate with Entra
To configure Bigeye:
- Go to https://app.bigeye.com/settings/single-sign-on
- Click New Connection
- Set the following values:
- Single sign-on provider: OpenID Connect (OIDC)
- Domain: your email domain (e.g. example.com). After this connection is activated, all email addresses for this email domain will be forwarded to your identity provider.
- Connection name: your email domain (e.g. example.com). This is an identifier used by Bigeye and your identity provider when they interact.
- Issuer URL: this is the URL that provides information about your OpenID Connect endpoints and which parameters are accepted. This URL should be accessible over the network that connects to Bigeye. Bigeye will append
.well-known/openid-configurationto the URL you provide. - Client ID and Client Secret as configured by your identity provider
- Click Save
Once the connection is saved, all logins for the domain specified will be validated by your identity provider. We highly recommend doing the following to verify your connection:
- Log in inside of another browser to verify that you can log in. If you are not able to log in, you may delete the Single Sign-on Connection inside of Bigeye to prevent other users from being locked out.
- Verify in your identity provider that the correct users are added to the applicable membership groups for Bigeye.
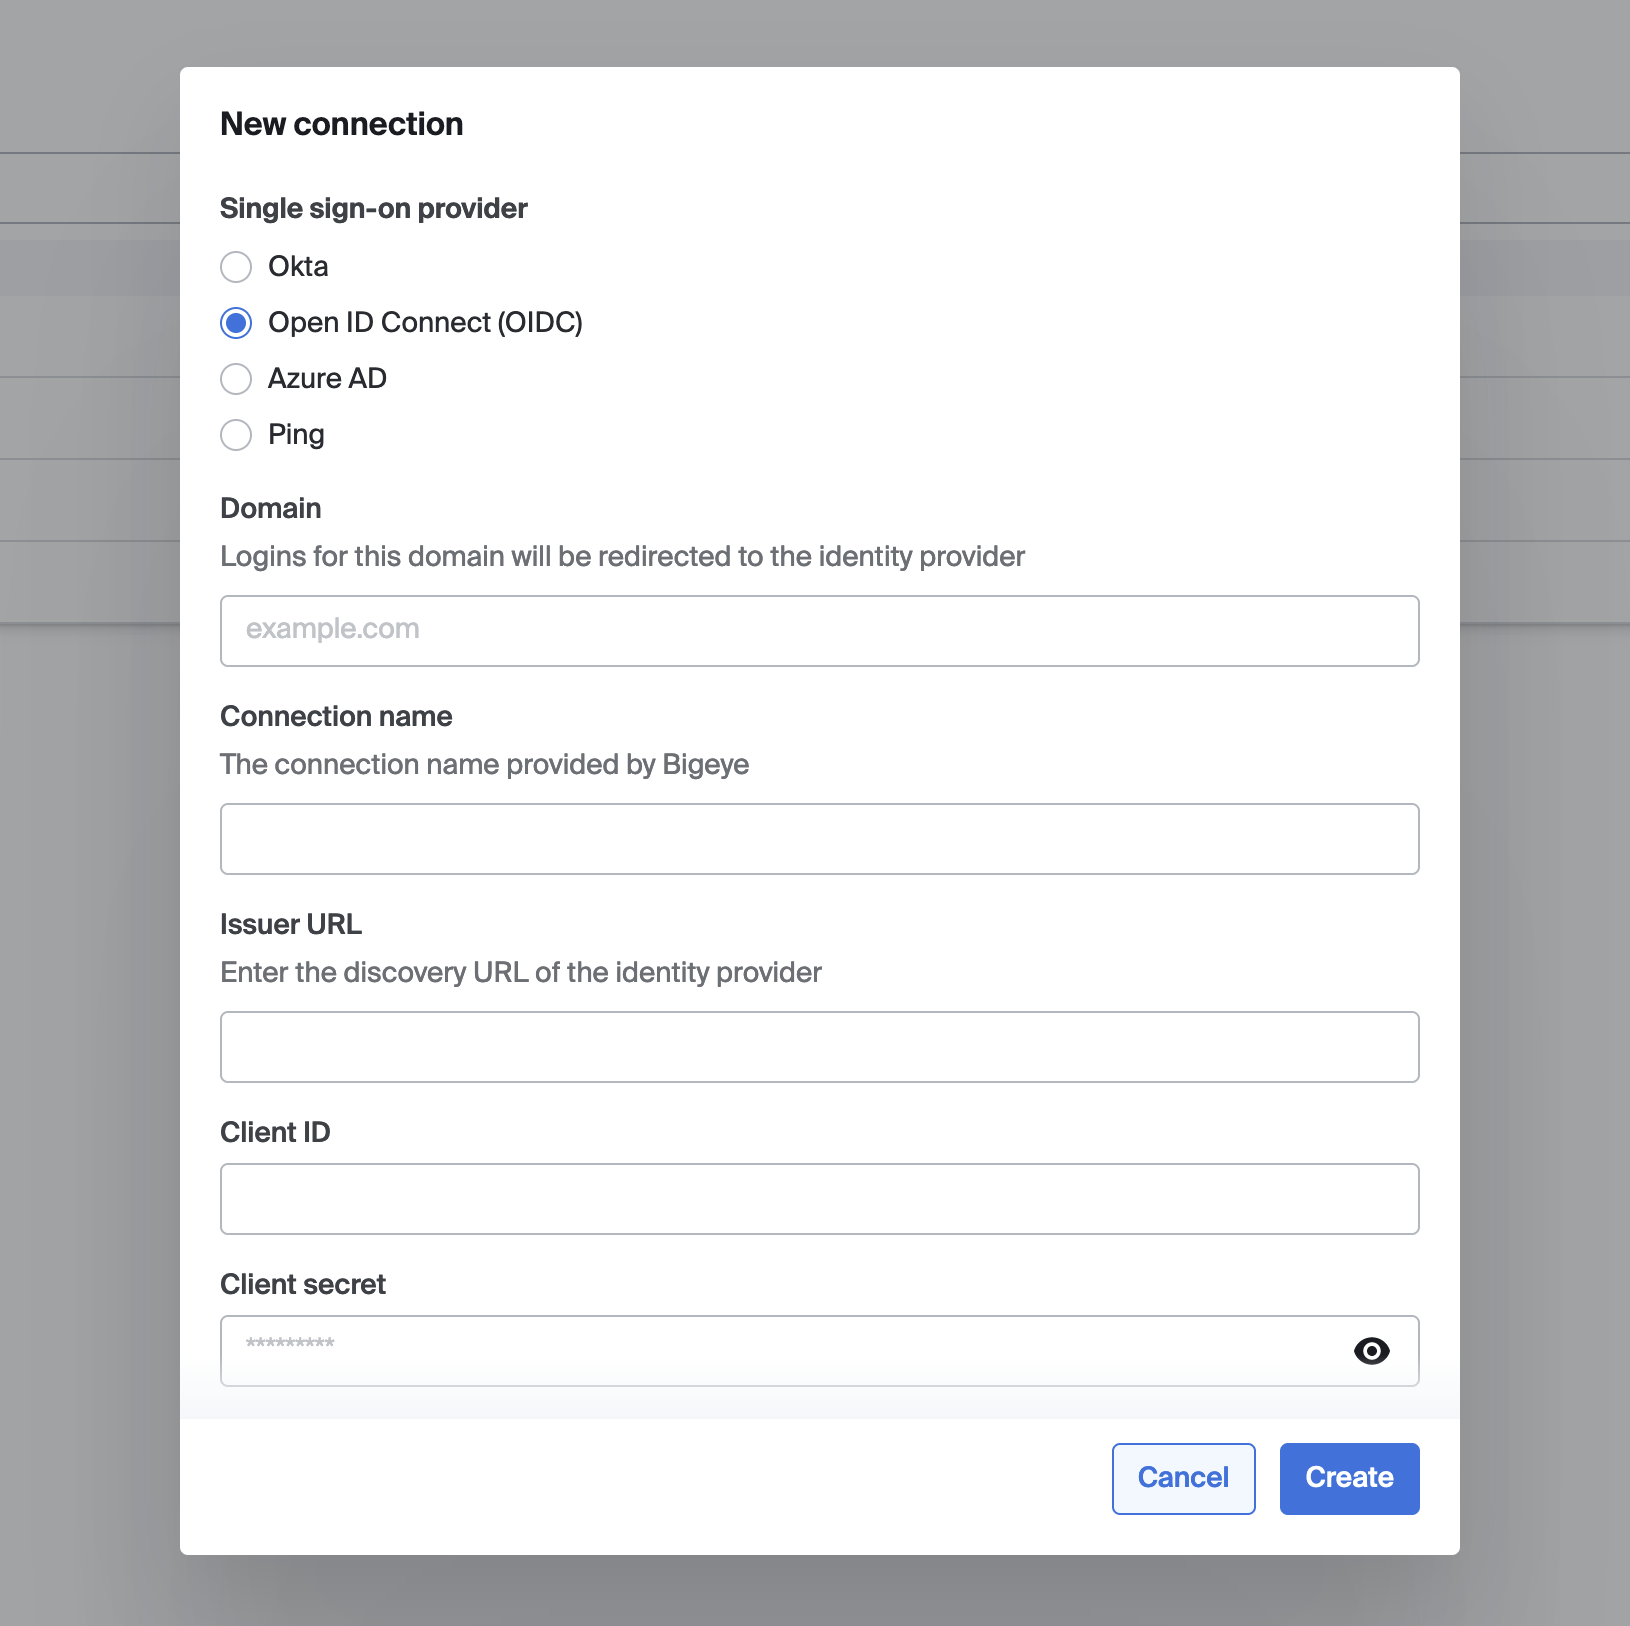
Configuration dialog for a new single sign-on connection
Troubleshooting
Need admin approval
The first time users log in through Entra, they may receive an error like "<user> needs permission to access resources in your organization that only an admin can grant".
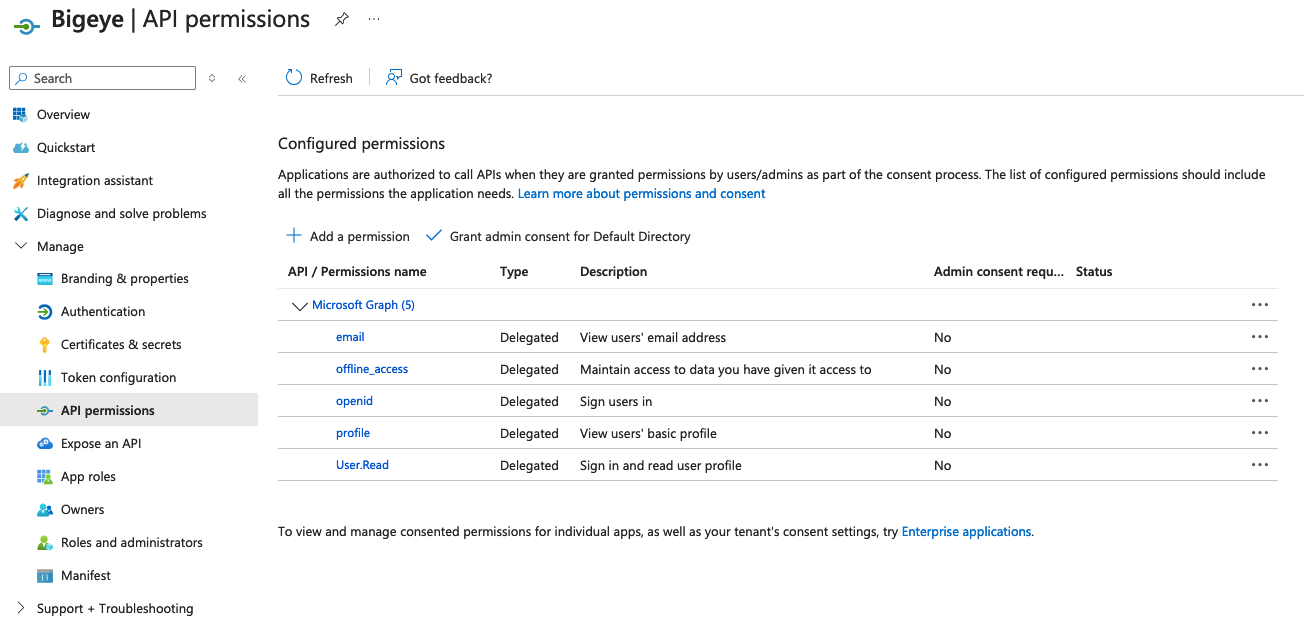
This occurs because API permission has not been set up for the User.Read API. This is what allows Bigeye to read the user's name and email, which are required for linking their Bigeye account.
Your organization may desire to approve each user to access Bigeye individually on a request basis. One way to allow users to access the application is to allow all users in the directory to read user profiles under the API permissions for the application.
Configure optional claims
If you receive an error stating that your SSO configuration is not configured correctly, please check the following:
- The client ID and client secret are correctly copied to Bigeye
- The
nameandemailclaims are being returned. To verify this, please check the API permissions above.
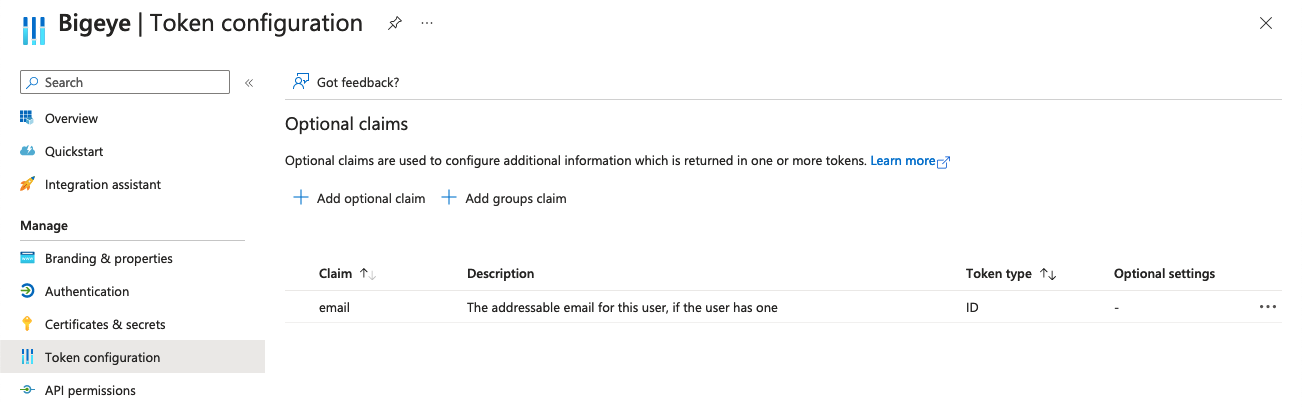
In some configurations, the email field is not automatically sent. To check this, view the Token configuration screen and check that an email claim is sent. If it is not present, you may add it by doing the following:
- Click Add optional claim
- Select Token Type: ID and check the email claim.
- Click Add
JKWS Errors
If you receive an error such as "failed to obtain jwk public key from IDP", this indicates that Bigeye cannot read the token sent by Entra. Please check that the application connection for Bigeye is configured to use OpenID Direct Connect and not SAML.
Updated 16 days ago