
SLAs
Group metrics into Collections and receive notifications when metrics alert.
Background
SLA's are arbitrary groupings of metrics on which you can configure alerts.
Let’s say you have a dashboard that depends on a certain table with 10 metrics configured. You can create an SLA that will alert you if any of this group of metrics goes out of bounds. Or, let's say you have have 5 absolutely mission-critical metrics for your team. You can create an SLA with those 5 metrics and have it @here or @oncall your team’s Slack channel.
Creating an SLA
The simplest way to create an SLA is from the SLAs page. You can navigate to the SLAs page from the top navbar. From the SLAs page, you can create a new SLA with the Create SLA button. This will open the Create SLA modal, where you can enter the name and description of your SLA. Once the SLA is created, it will show up as a card on the SLAs page. You can navigate to the SLA by clicking the corresponding SLA card.

Once you navigate to the SLA, there isn’t much to see because the SLA is still empty. In the next section, we will learn how to add metrics to an SLA.
Adding metrics to an SLA
We can add metrics to the SLA from the Metrics pages. From an SLA page, you can navigate to metrics by clicking on the Catalog tab, then on the relevant schema/table, and then the metrics tab.

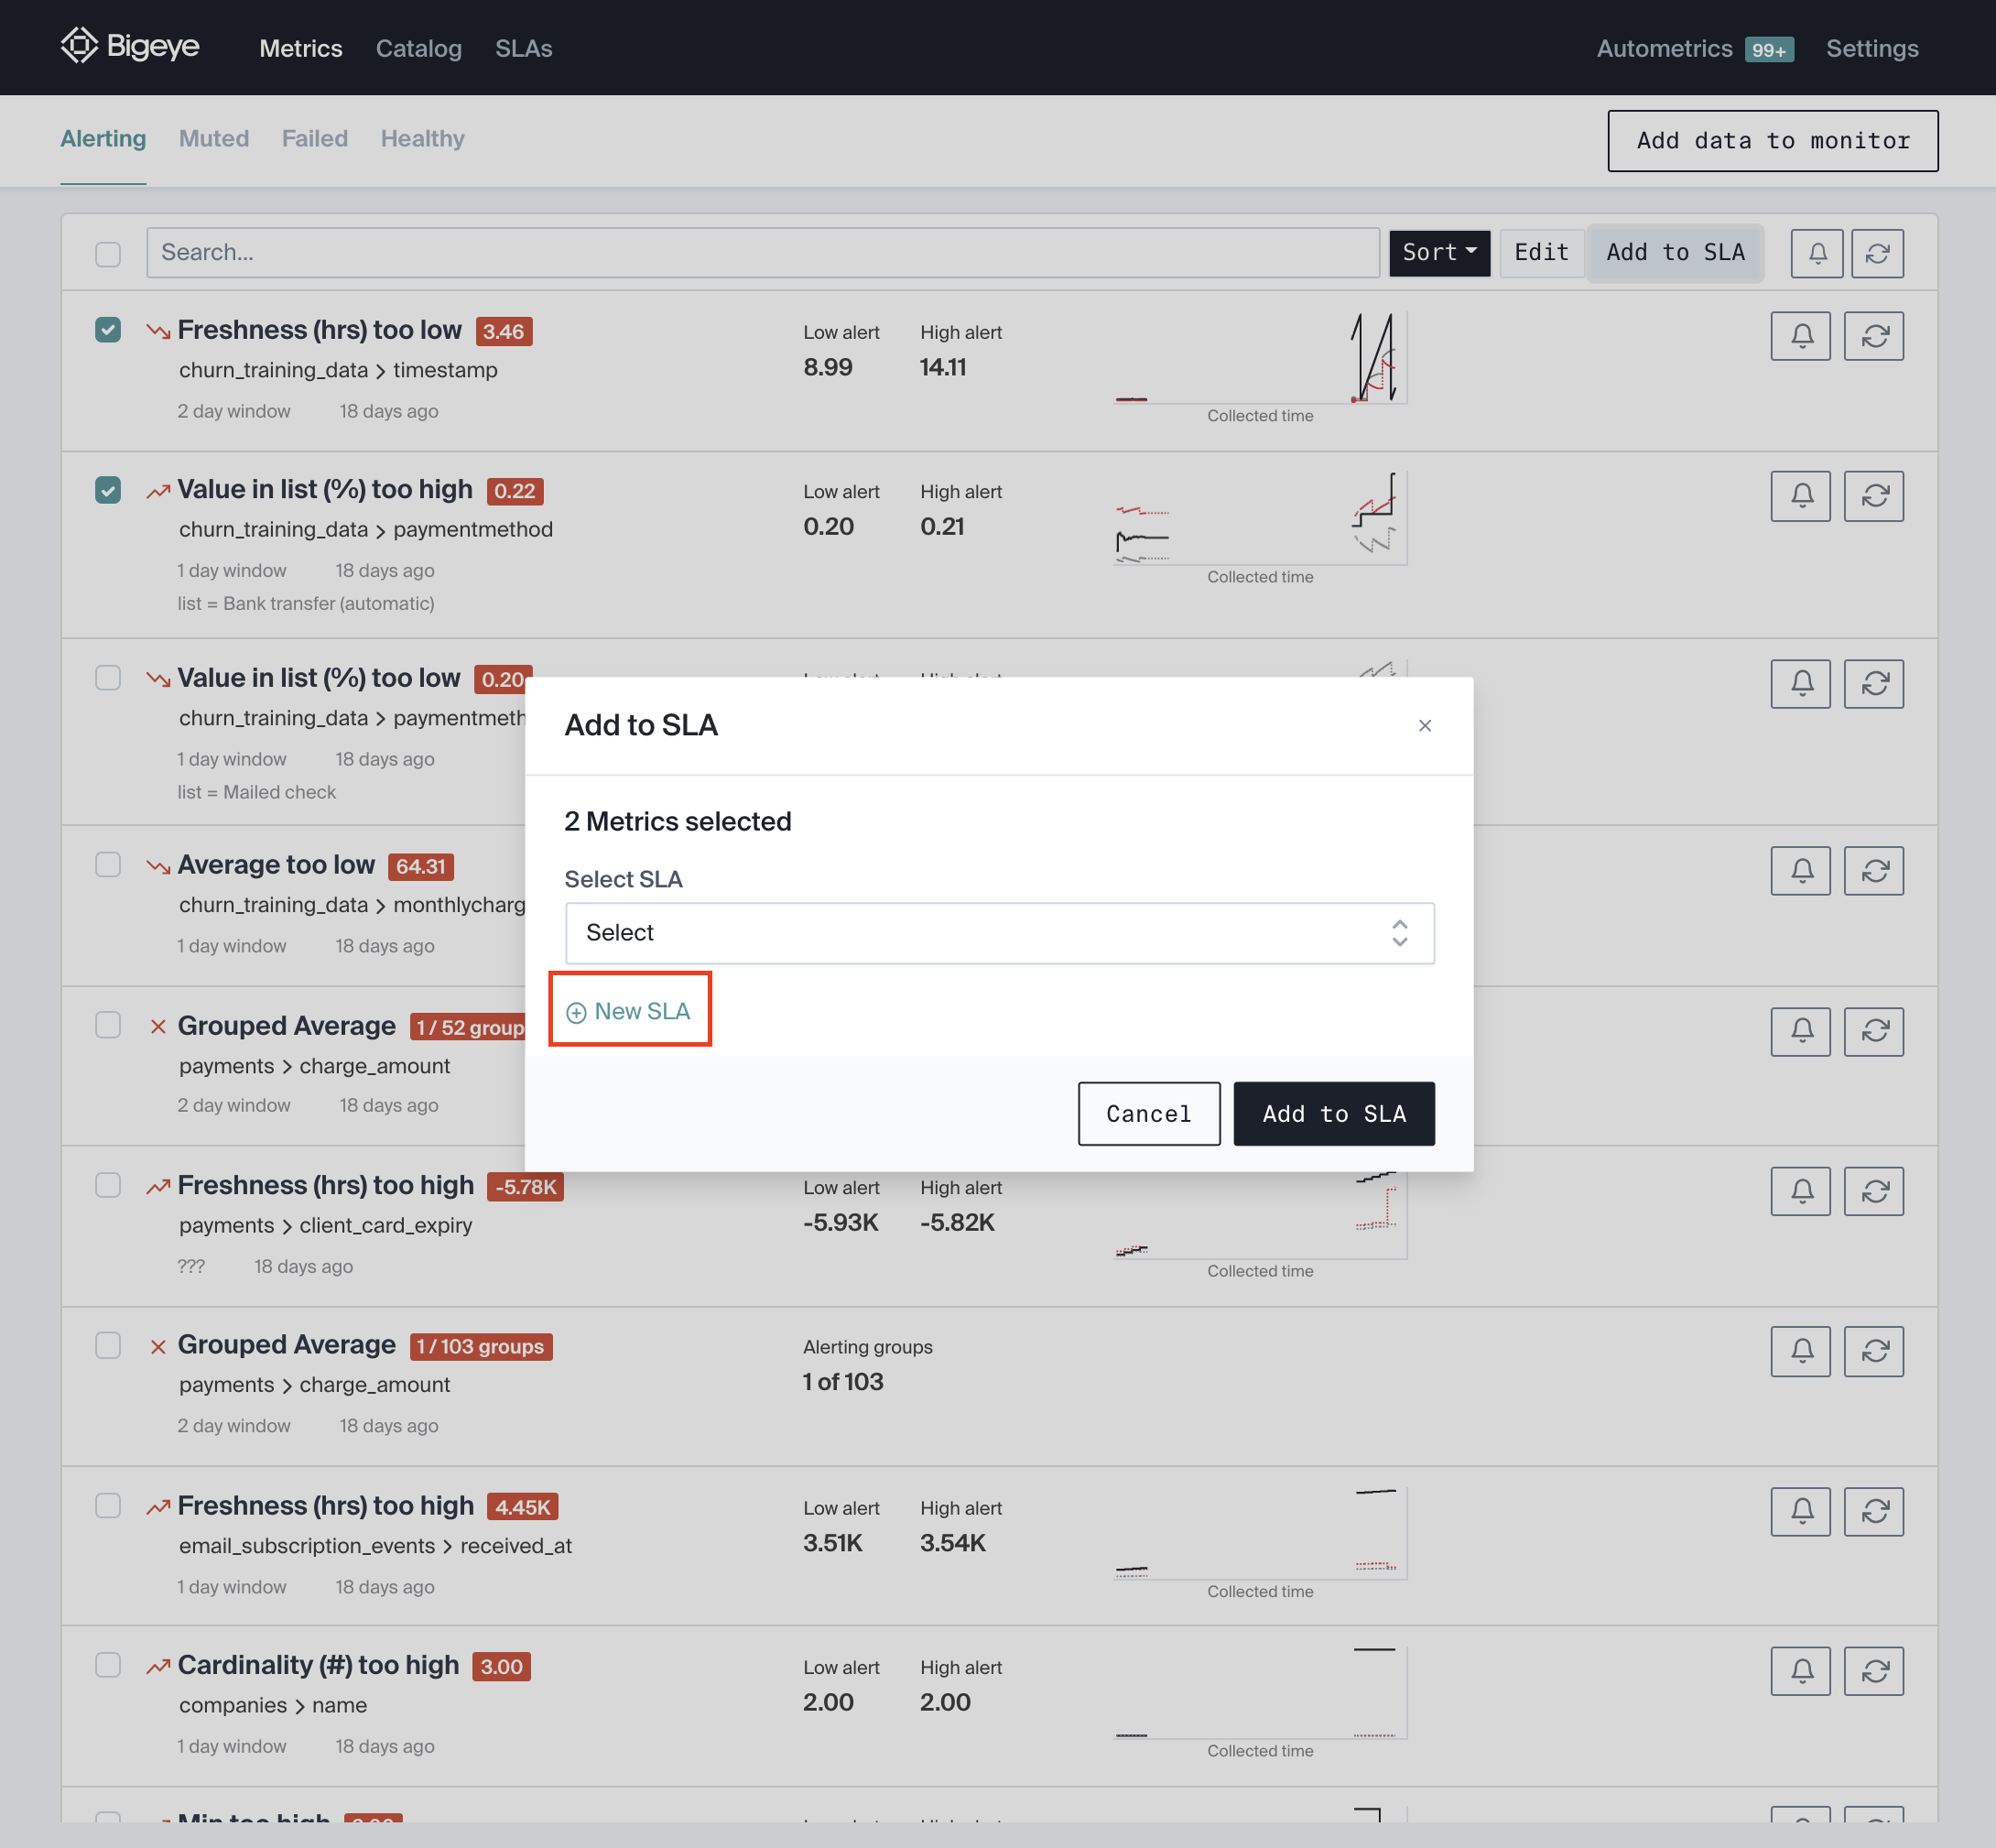
On Metrics pages, you can select one or more metrics and add them to a SLA by selecting Add to SLA from the Action dropdown. In this modal we can see that the SLA we created is available in the dropdown, so we select that SLA.

Once the metrics are added we can quickly navigate back to the SLA with the link in the success alert. You should now be able to see the metrics in the SLA (you may have to refresh).
Another way to create SLAsYou can also create new SLAs from the Add to SLA modal. This will create an SLA and add the selected metrics to it in one step.
Managing an SLA
Now that we have added metrics to the SLA, we can see them and their status in the SLA page.

Add notifications to an SLA
One of the useful functions of SLAs is that we can add notifications to the SLA. To do this, simply click on the Settings button and navigate to the Notifications tab in the modal that opens.

Under the Notifications tab, you can add notifications. See here how we've added an email and a Slack channel.

Remove metrics from an SLA
To remove metrics from an SLA, you can select one or more in the SLAs page and then select Remove from SLA in the Action dropdown menu.

This opens a confirmation dialog, and to complete the removal, click the Remove button.
Deleting an SLA
To delete an SLA, click the Settings button in the SLAs page. Under the Name and description tab, there is a Delete SLA button.

Clicking that Delete SLA will open a confirmation dialog. Click the Delete button to complete deletion of the SLA.

SLA notifications
When you configure notifications on an SLA, they will be sent whenever a metric in the SLA goes into an alerting state. These alerts are in addition to any notifications that you may have configured on the metric itself. What this means is that if you have configured an alert to email on a metric and on an SLA that contains the metric, you will get two emails whenever the metric goes into an alerting state.
Remember above that we configured an email and a slack notification on our SLA. If a metric in that SLA goes outside of its healthy bounds, I will get the following Slack and Email notifications:


Updated 9 months ago